 We grow a lot of garlic using organic and cost effective methods. It’s very easy to plant and requires little maintenance. After a long winter and when spring finally arrives, you’ll be excited to see the garlic you planted in fall starting to grow. It’s like an unexpected gift that keeps on giving.
Below are top tips from our experience with what works great for us. Hopefully, you’ll find a new technique or two.
Planting & Growing
- The best time to plant garlic is in the fall for a summer harvest. This will help you obtain larger and tastier bulbs. If you choose to plant in early spring, we recommend doing this as soon as your ground is tillable. The earlier the better.
- There are hundreds of sub-varieties of garlic. Why limit yourself to one or two? Select a combination of types to grow. You’ll soon be able to identify from experience what works best in your garden. We grow between 8 to 10 varieties each year. The cloves we saved from our seed garlic from the prior harvest are planted along with new ones we want to try.
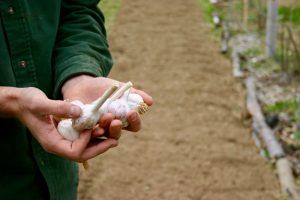
- We select the largest bulbs when harvesting to cure (drying) and save for seed garlic. Did you know cloves produce garlic bulbs that are genetically identical to the originating plant?
- For easier identification, place flag markers between each variety of planted garlic. Mark the name of your garlic on the flag with permanent marker. You can then place this flag marker with the harvested garlic during the cure period. It’s an easy way to remember what type of garlic you planted and would like to grow again.
- In late fall or early winter, we plant our cured garlic cloves on ground that’s been thoroughly tilled. After planting, we pile on straw. We’re an organic farm and never spray any herbicides or pesticides. A thick layer of straw will discourage weeds from growing. We still get a few weeds that require pulling during the growing season but it’s drastically reduced with our straw mulch.

- As the garlic grows you’ll need to pull the scapes out. Many believe that such removal triggers more energy into the garlic bulb, producing a larger bulb. Garlic scapes are edible and taste great grilled, used in pesto rather than basil, or flavoring savory dishes. Read our blog instructions about harvesting garlic scapes for detailed information.
- It’s fun experimenting with different types of garlic. You typically find only one or two varieties at the local grocers. For reference, we’ve listed a few places that offer a variety of organic seed garlic.
Harvesting & Curing
- Most, if not all, garlic varieties should be cured before eating or using as seed garlic. We don’t recommend that you plant garlic cloves purchased from your grocers.
- When the tops die back and the stems are flimsy, it’s time to pull your garlic.
- Garlic pulls easier if the ground is not overly dry. Otherwise, you might have to dig them out and risk breaking a few. When you pull your garlic, shake off as much dirt as possible.
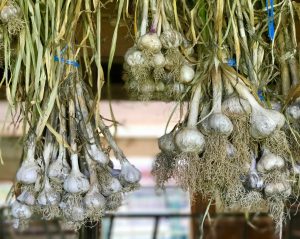
- You need to cure your garlic for storage purposes. Keep the roots and stems intact when curing. We prefer to tightly tie 10 to 20 bulbs in a bunch, depending on size. We use twine and tightly tie around the narrow part of the stems leaving a long piece of string in order to hang. The garlic bunch is then hung from rafters in our barn. No barn, no problem. Try hanging your garlic in your garage or storage shed. Just make sure the place you select is in a warm, dry area with good air circulation. Another option is to lay your garlic on grates, which provides air flow during the drying period.
- Garlic is finished curing typically within 2 to 3 weeks. The outer layers will be dry and the top stem will have no moisture. The stems must be completely dry. After the curing period, simply trim the tops about an inch or two above the bulb taking care not to cut the skins protecting the cloves. We also trim the roots. Store your garlic in a dry and cool area until you’re ready to enjoy. Your garlic should last between 6 to 8 months depending on where it’s stored.