 For many years we’ve enjoyed chickens as pets and producers of eggs. We love the opportunity to raise them from day old to adulthood. Peeps require special surroundings for the first few weeks of their life after they arrive from the hatchery. The most important thing to provide is a warm and safe brooding area (brooder) for them to grow and feather out.
This brooder must provide warmth, abundant water, food and enough space for the peeps not to be crowded. We’ve used different methods in the past and now this has changed after our neighbors showed us their brooder. Not only did we learn a better technique, they are graciously brooding our peeps until they’re ready for the move to our chicken coop.
All of our neighbors are amazing and involved with organic farming. We frequently support each other’s projects and then share with the harvest and/or knowledge. We’re very fortunate to have wonderful neighbors living only three minutes away.
Here’s a preview of their setup for a larger number (50 plus) of peeps:
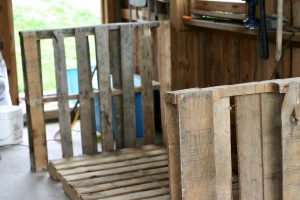
Step 1 – Pallet Frame
Pallets are used as a base to keep the peeps off the cold cement floor. Two pallets on the bottom and one pallet on each end were put into place. This setup was situated next to a wall and thus a pallet was not required on one side. The side opposite the wall will be lower and therefore no pallets are required. This lower wall will allow someone to easily take care of the peeps. The pallets are attached to the walls with screws.
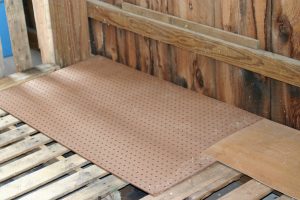
Step 2 – Floor
Light wood and wood scraps were used as the floor base over the pallets. You’ll notice that some of the wood (pegboard) has holes. This is not a concern because it will be covered with heavy cardboard
Step 3 – Walls
Light plywood was placed on the inside of the pallets for walls. Screws were used to hold them in place. A very simple process.
Step 4 – Makeshift Divider (optional)
Heavy cardboard or light wood can be used as a temporary divider. As the peeps are small the divider will keep them in a tighter group for warmth. This divider will be removed to allow more room for the peeps as they grow.
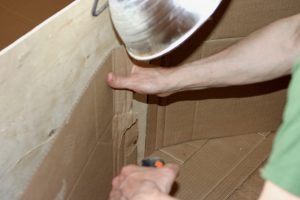
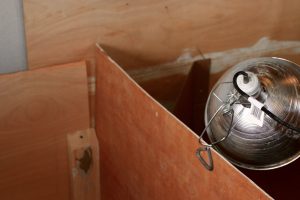
Step 5 – Floors and Corners
Heavy cardboard was placed on the floors and corners. They were stapled securely with industrial staples. As you can tell from our photo above, a cardboard piece was placed across the corner to create a slight curved wall. This will keep the peeps from mishap with sharp corners by preventing them from piling up in a group and suffocating.
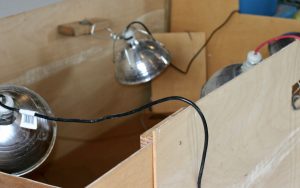
Step 6 – Lamps and Warmth
The peeps need to stay warm. Trouble lights were used with 60-watt bulbs. The lights are clamped above the peeps at a height that keeps the temperature around 90 degrees. As the peeps begin to feather out and grow, the lights will be moved farther away to reduce temperature.
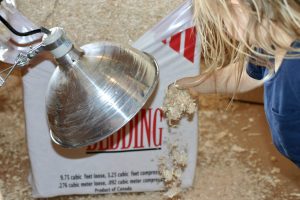
Step 7 – Bedding
The fun part and the last step in peep preparation is to spread pine shavings (bedding) around the floor. It’s recommended that you don’t use cedar. This is a task that the little ones can easily handle and enjoy.
Please provide comments, questions or techniques you found successful. Also, visit a few of our recommended sites (noted below) for additional information on brooding peeps and different brooders you can make or purchase.