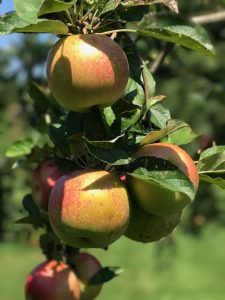
How do you handle more apples than you can process, eat or give away? You press them. And that is exactly what our family decided to do. Now that we’ve pressed our first gallon of homemade cider, I realize we should have been pressing apples years ago.
I have a tendency to over analyze and research into details before purchasing any equipment. With a cider and fruit press I wanted a model that was sturdy, built to last, easy to use and simple to clean. After researching and analyzing reviews and of course, price comparisons, I decided that Pleasant Hill Grain offered the best support and models. The products are also available on Amazon. Better yet, shipping is free and I was informed that it would be delivered within 7 days. Just in time for our early apples.
Not an apple cider person? Presses are great for a variety of fruit including pears and grapes. You’ll need to cut the skin on your grapes before pressing.
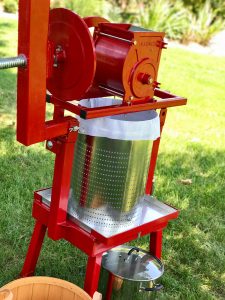
Cider Press
Our chosen press…
Our final selection was the Maximizer Fruit Press with a stainless steel basket. I decided that the larger 36 Liter version is a wiser choice because of our anticipated volume of future apples. They also have a 4 gallon and a table top version that would be sufficient for most people. I also added the Maximizer Apple Grinder, food grade grease and mesh bags for better processing of the apples. Other smaller models of presses are available.
You have two choices in the pressing basket materials. You can select an oak or a stainless steel basket. We chose the stainless steel. Why? Well, I am one for saving time, especially with cleaning up tasks. I figured stainless steel is easy to wash with a garden hose and doesn’t require upkeep maintaining the wood basket. I was right – cleanup was a breeze.
Arrival…
As promised, our press arrived within 7 days and was in 3 boxes. The packaging far exceeded my expectation. I can tell that this company wanted to ensure that nothing was damaged.
 Set-up…
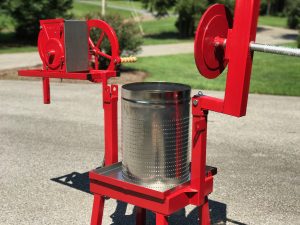
Follow the directions and you’ll be fine. The instructions were sufficient, however I prefer more illustrations. Regardless of my personal preference for step-by-step photos, my partner was able to put the press together within 30 minutes. It was beautiful and I couldn’t stop taking photographs of our final product. I love the red paint and authentic, cool look. The set-up procedure is basically putting the legs on, adding the top grinder, screw on a few bolts and grease the equipment. The process was not difficult.
Let’s discuss the greasing job. You’ll need to heavily grease in areas they recommend. Trust me! After pressing, we wanted to add more grease to ease the manual labor required for cider making. Any reduction of friction is a plus. More grease equates to less manpower during the turning of the pressing wheel.
What we wished…
The site suggested a base, especially if you have an apple grinder on top of your press. This is something we’re going to do. Note: with a grinder your press will become top heavy when it’s moved over to the side when you’re at the steps of pressing your apples. We’re thinking of mounting our press on plywood for stability. The only disadvantage with mounting is the ability to easily move your press from storage to the orchard, barn or yard.
Without the press being mounted, it’s easy to move when the top grinder is off the main pressing component. The engineering of this product design is great. It allows for quick removal of certain components for transportation. Pleasant Hill Grain offers an optional wheelbase for the press. It would allow me to move it by myself without the need for another person. I might consider this option in the future. This is most definitely a convenience solution if I should happen to become the only person around during pressing. I think this will occur quicker than I expect.
Collecting your apples…
Oh my, this was fun. First, you need to pick your apples. We found that experienced pressers recommend a combination of tart and sweet apples and that is exactly what we did. We used Stayman and McIntosh apples. Do not pick apples from the ground because of the risk of contamination from bacteria and droppings from animals that might be on the fruit.
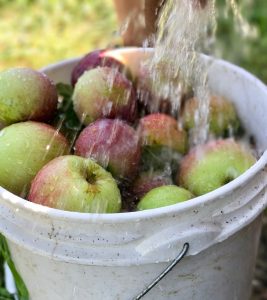
Next, you have to wash your apples. An outdoor hose and big bucket works fine. Set aside any apples that look less than perfect for the chickens or compost. Why risk any unwanted elements in your final cider.
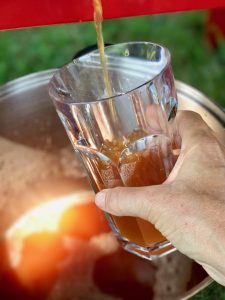
Our end result was delicious. Not overly sweet but with a slight tartness that you’d expect from fresh apple cider. We’re going to experiment with apple types and percentages. We’ll post our findings in future articles on our blog.
Using the grinder…
We purchased the Maximizer Apple Grinder for two reasons. One was to ease the process of pressing. And secondly, my research indicated that we would get a larger production of cider (by three fold) if we grind the apples before pressing. That’s a large increase and one that I believe to be an investment in which I’ll regain my cost from cider production over time. This grinder is not required. Because we have plenty of apples and I desire massive amounts for hard cider and wine, I reasoned that I should invest now rather than later.
We found that cutting the apples in quarters or halves worked better than putting smaller pieces of apples into the grinder. The smaller pieces went through the press without pulverizing into pummels. Yep – pummels is the correct word for ground apples. Why? I don’t know when I find myself referring to it as mush.
The grinder is easy to use. The only thing we realized was that our mesh bag kept falling into the stainless container and therefore required someone to hold it over the edge. Not a big deal, but something you need to do. Knowing me, I’ll figure out a solution for when I become the only person around during pressing.
Our first press…
This was fun. Pressing is harder than I imagined but a rewarding process as soon as the cider starts running into your container. At first, it was easy to turn the handle but when the crushed apples start compressing it became harder. I am into strength training and yet found this task difficult. The men on the farm had to take over. Maybe I need to train harder.
It was so satisfying to get our first glass of cider. It was amazing.
End result; we obtained almost a gallon of cider from 5 gallons of apples. We believe this will increase when using ultra soft and ripe apples.
Clean up…
Super easy. I wish cleaning dinner dishes was fast as cleaning a cider press. Immediately after pressing, take your garden hose and rinse it down. It’s best to clean up right after use; if fruit pulp is allowed to dry the removal can become difficult.
The mesh bag was easy to clean as well. Simply remove the pulp and rinse off completely in your kitchen sink. I then put the mesh bag into the washer on gentle cycle. It came out perfectly clean and ready for our next pressing.
The left over pulp from the apples will be used for chicken feed or fertilizer for growing new apple trees. Nothing is left to waste.